[Learning Notes] Windows Downdate: Vulnerability Discovery and Exploitation
Overview
In this post, the author discovers vulnerabilities in Windows Update by examining its architecture and execution flow. Under Administrator privileges, an attacker can manipulate registry keys to control arbitrary system files, replacing them and bypassing system integrity checks. Due to the lack of downgrade file validation in the operating system, this capability can be leveraged to achieve further privilege escalation and security boundary bypasses.
Principles
Windows Update Architecture
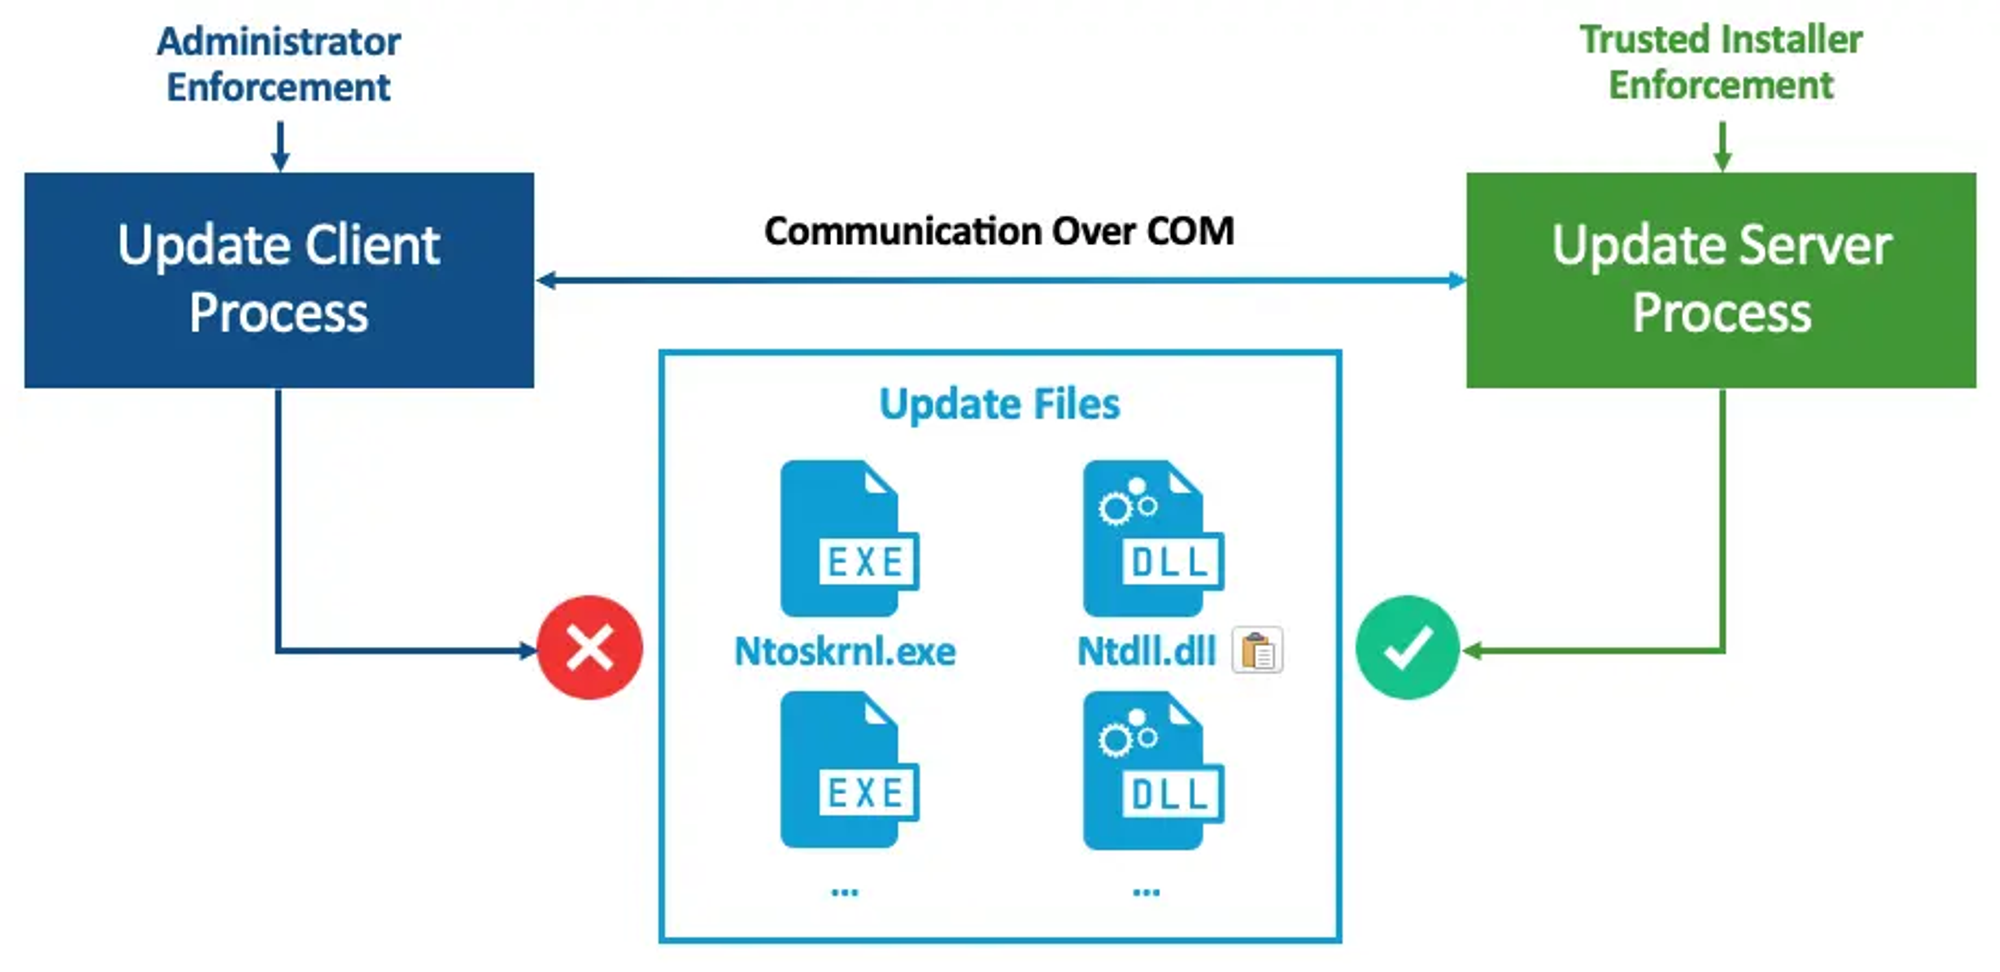
Approach 1: In the architecture shown above, privilege escalation from Administrator to Trusted Installer is possible. Therefore, restricting permissions solely to Trusted Installer does not guarantee security.
Problem: The privilege escalation process will be intercepted by EDR (Endpoint Detection and Response) agents, preventing evasion.
Windows Update Flow
- The client requests the server for an upgrade and provides an update directory.
- The server verifies the integrity of the update directory.
- During verification, the server processes the files in the update directory to generate the update files, saving them in
%WinDir%\WinSxS\, a folder controlled by the server that is inaccessible to the client. - The server creates an action list named
Pending.xmlin this directory, which contains the operations to be executed during the update (e.g., which files to update, source and destination paths, etc.). - Finally, the system restarts. During the reboot process, the system updates itself according to the action list.
Approach 2: In the entire flow, the only controllable component is the initial update directory. We need to check whether modifying this directory allows us to control the subsequent process, leading to the downgrade of update files.
🎯 Target: Update Directory
The update directory consists of the following files:
- MUM files (Microsoft Update Metadata): Contains metadata, component dependencies, installation order, etc.
- Manifest files: Contains installation-related details, such as file paths, registry entries, etc.
- Delta files: Base file + delta file $\rightarrow$ complete update file.
- Catalog files: Digital signatures for the MUM and manifest files. Rather than embedding signatures inside each file, a single catalog file signs multiple files, and the catalog file itself is signed. Consequently, the catalog files and the files they sign cannot be tampered with.
Therefore, delta files do not have any signatures. However, their hashes are stored in the manifest files.
🎯 Target: Action List (Pending.xml)
The action list is saved in a directory controlled by Trusted Installer. It is easy to overlook this file, but the author reasoned that since the update process spans multiple reboots, the action list cache must be stored somewhere.
My initial assumption was that the system would directly read the file from the directory. However, it is more logical that, similar to reading data from disk into memory, a real-time state of the list is persisted during the update process.
How do we find this location? The author chose to search the registry! (I wouldn’t have thought of that.)
Searching for pending.xml in the registry points to the following key:

Note: This registry key might only exist when the system requires a reboot to update.
poqexec.exe (Primitive Operations Queue Execution Utility) does not have much documentation online, but the command line arguments clearly indicate that this program parses the pending.xml file.
The author mentioned checking the security attributes of this key. I didn’t know how to do that, or rather, I didn’t realize that registry keys had permissions.
Registry permissions can be checked via Edit $\rightarrow$ Permissions:
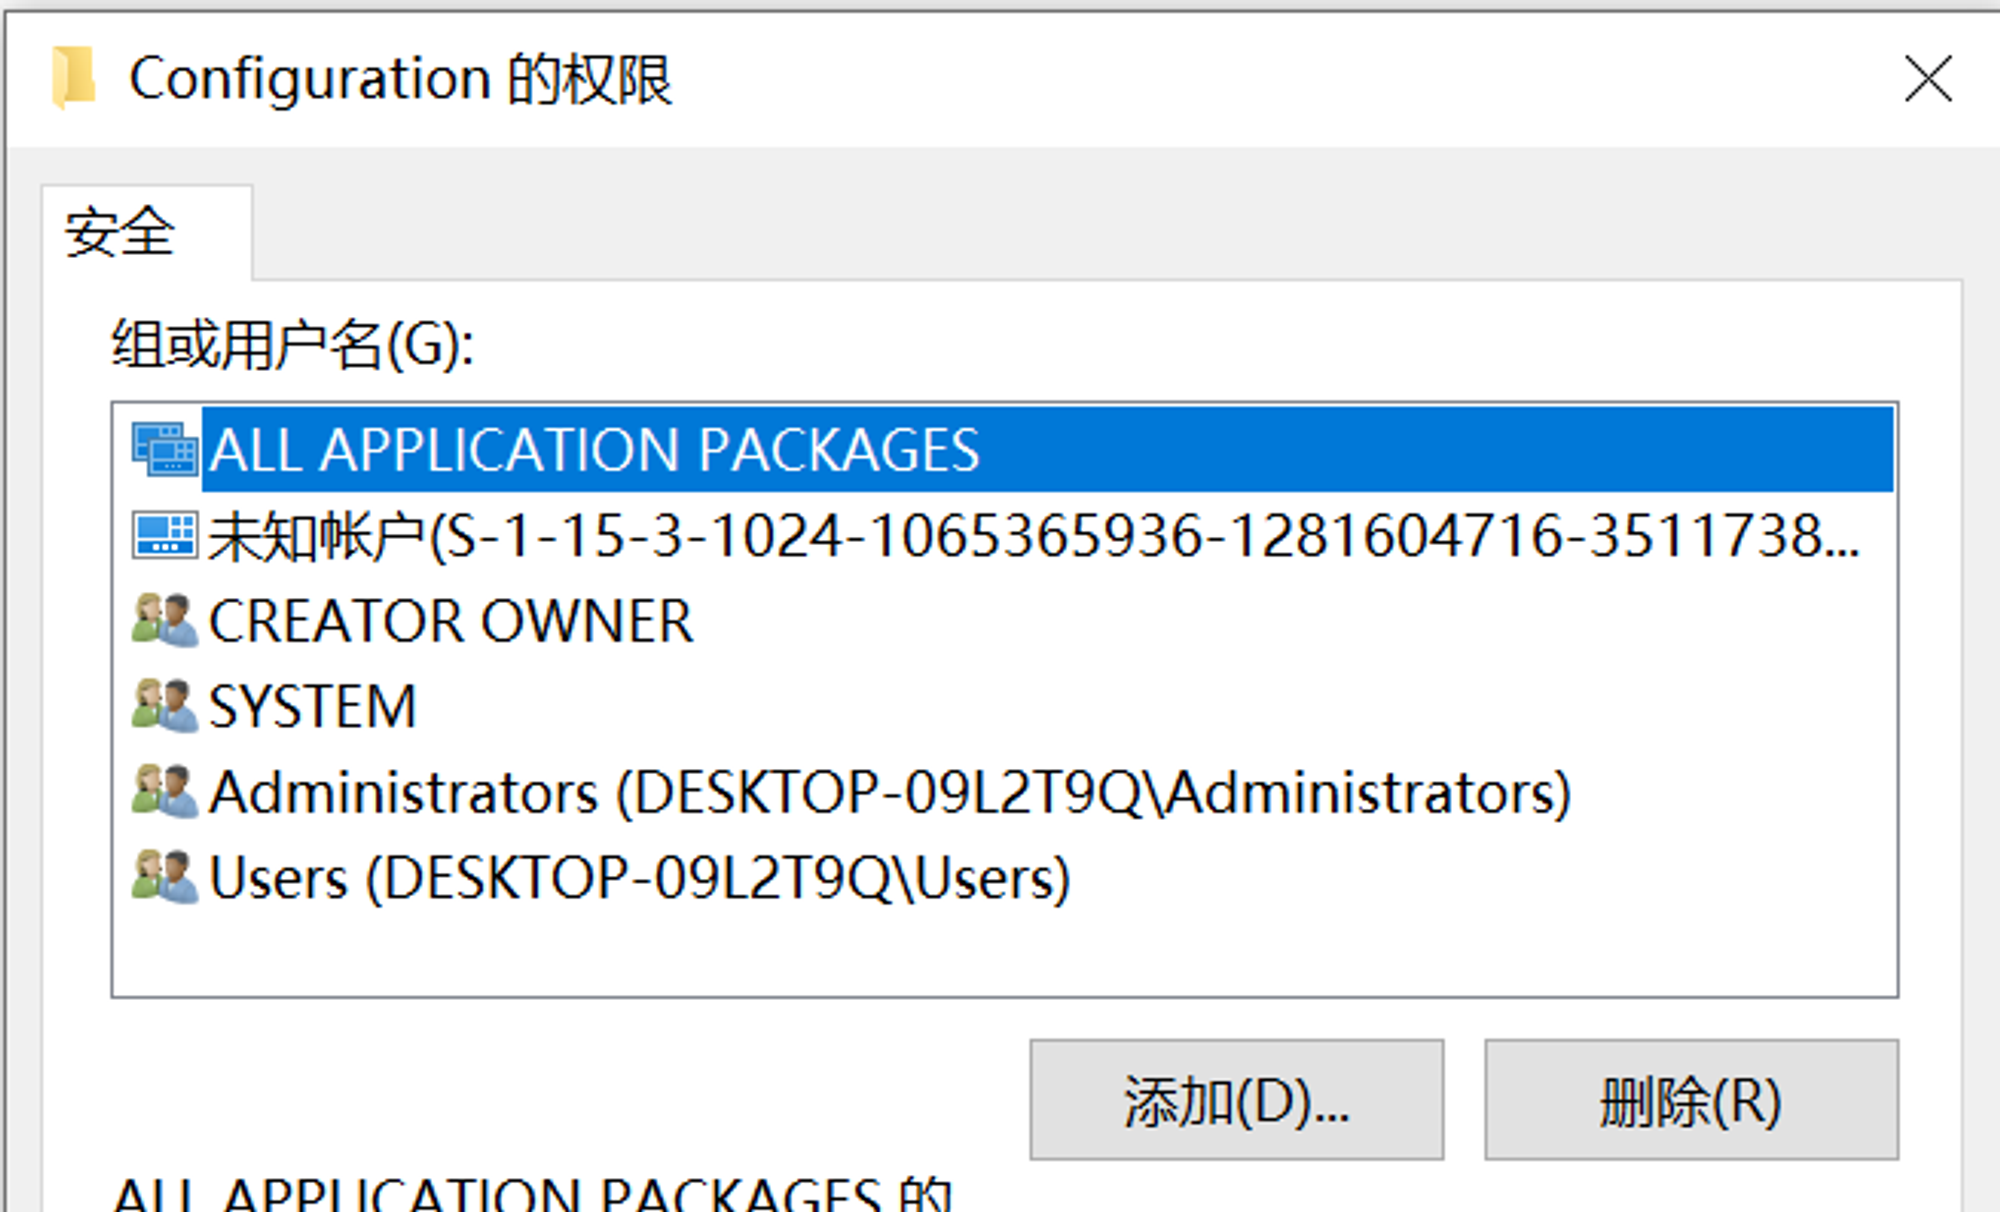
This registry key is not restricted exclusively to Trusted Installer. Therefore, modifying this key allows us to control the behavior during update reboots.
We can write a custom pending.xml file and then modify the registry path to point to our custom pending.xml.
The <POQ postAction="reboot"> tag in the pending.xml file controls the behavior during reboot. We can modify the source attribute in HardlinkFile so that it replaces the file specified by destination during reboot.
Here I have a question: why can’t we modify the source and destination of MoveFile? Based on the values in the fields, different operations are parts of the update pipeline. MoveFile moves files in the update directory, which are subsequently modified during the update process, and finally placed into the system directory via HardlinkFile. Therefore, modifying MoveFile alters an intermediate step and will cause subsequent phases to fail, whereas modifying HardlinkFile alters the final step of the update, which does not disrupt other operations.
The article also mentions a key HKLM\COMPONENTS\PendingXmlIdentifier. I couldn’t find this key and do not know the conditions for its creation. According to the article, this key is compared against the identifier in pending.xml to ensure file integrity.
Therefore, to perform a controlled update, we only need to:
- Set the Trusted Installer service to automatic startup;
- Add the
PoqexecCmdlinekey to the registry and set it to the path of our custompending.xml; - Add the
PendingXmlIdentifierkey to the registry and set it to the correspondingIdentifiervalue.
The action list file is generated at the very end of the update process, right before the reboot. By the time it is generated, all integrity checks have already finished. Therefore, modifying the path to pending.xml in the registry at this point will not disrupt the update verification.
Furthermore, through configuration in pending.xml, we can replace files like poqexec.exe and SFC.exe. These files are related to the update process and lack digital signatures, making them susceptible to tampering. By modifying poqexec.exe to perform no actual updates when executing file writes, the downgraded files will not be overwritten by newer versions. Similarly, modifying SFC.exe prevents the system from running integrity checks and repairs.
At this stage, we can control any file on the system, replacing it with arbitrary content.
Achievable Capabilities
Presumably because this attack vector was unexpected, many features in Windows lack mechanisms to detect downgraded files. Once we have the capability to replace any system file, we can bypass various security boundaries.
Windows Virtualization-based Security (VBS)
Windows VBS uses virtualization features on modern CPUs to create an isolated, secure environment within the operating system. This environment isolates the OS and critical system components from potentially malicious software, providing an extra layer of defense.
VBS features include Credential Guard, HVCI, System Guard Secure Launch, Shielded VMs, etc.
- Credential Guard is a security feature in Windows 10/11 and newer versions that uses Virtualization-based Security (VBS) to isolate and protect sensitive credentials, such as NTLM password hashes and Kerberos Ticket Granting Tickets (TGTs). Credential Guard stores and secures credentials in an isolated virtual environment, ensuring only privileged system software can access them. This isolation prevents unauthorized credential harvesting, protecting the system from credential theft attacks like Pass-the-Hash and Pass-the-Ticket.
- HVCI (Hypervisor-Enforced Code Integrity), also known as Memory Integrity, uses virtualization to create an isolated layer (the Hypervisor) between the operating system and the hardware to monitor and protect code integrity during execution. Through HVCI, Windows ensures that only validated and digitally signed code can execute in critical areas like kernel mode, preventing malware from tampering with memory or using unsigned drivers.
- System Guard Secure Launch is a secure boot process introduced in Windows 10 and later. It leverages the latest hardware security features and virtualization technology to maintain system security from boot to runtime. Secure Launch validates the integrity of system firmware, drivers, and the operating system at startup to ensure they have not been tampered with.
- Shielded VMs (Shielded Virtual Machines) are an enhanced security solution for virtual machines. They are designed to protect VMs from various attack vectors, including guest firmware tampering, compromised guest-VM kernels or user-mode vulnerabilities, and malicious fabric administrators tampering with guest-VM images.
VBS Architecture
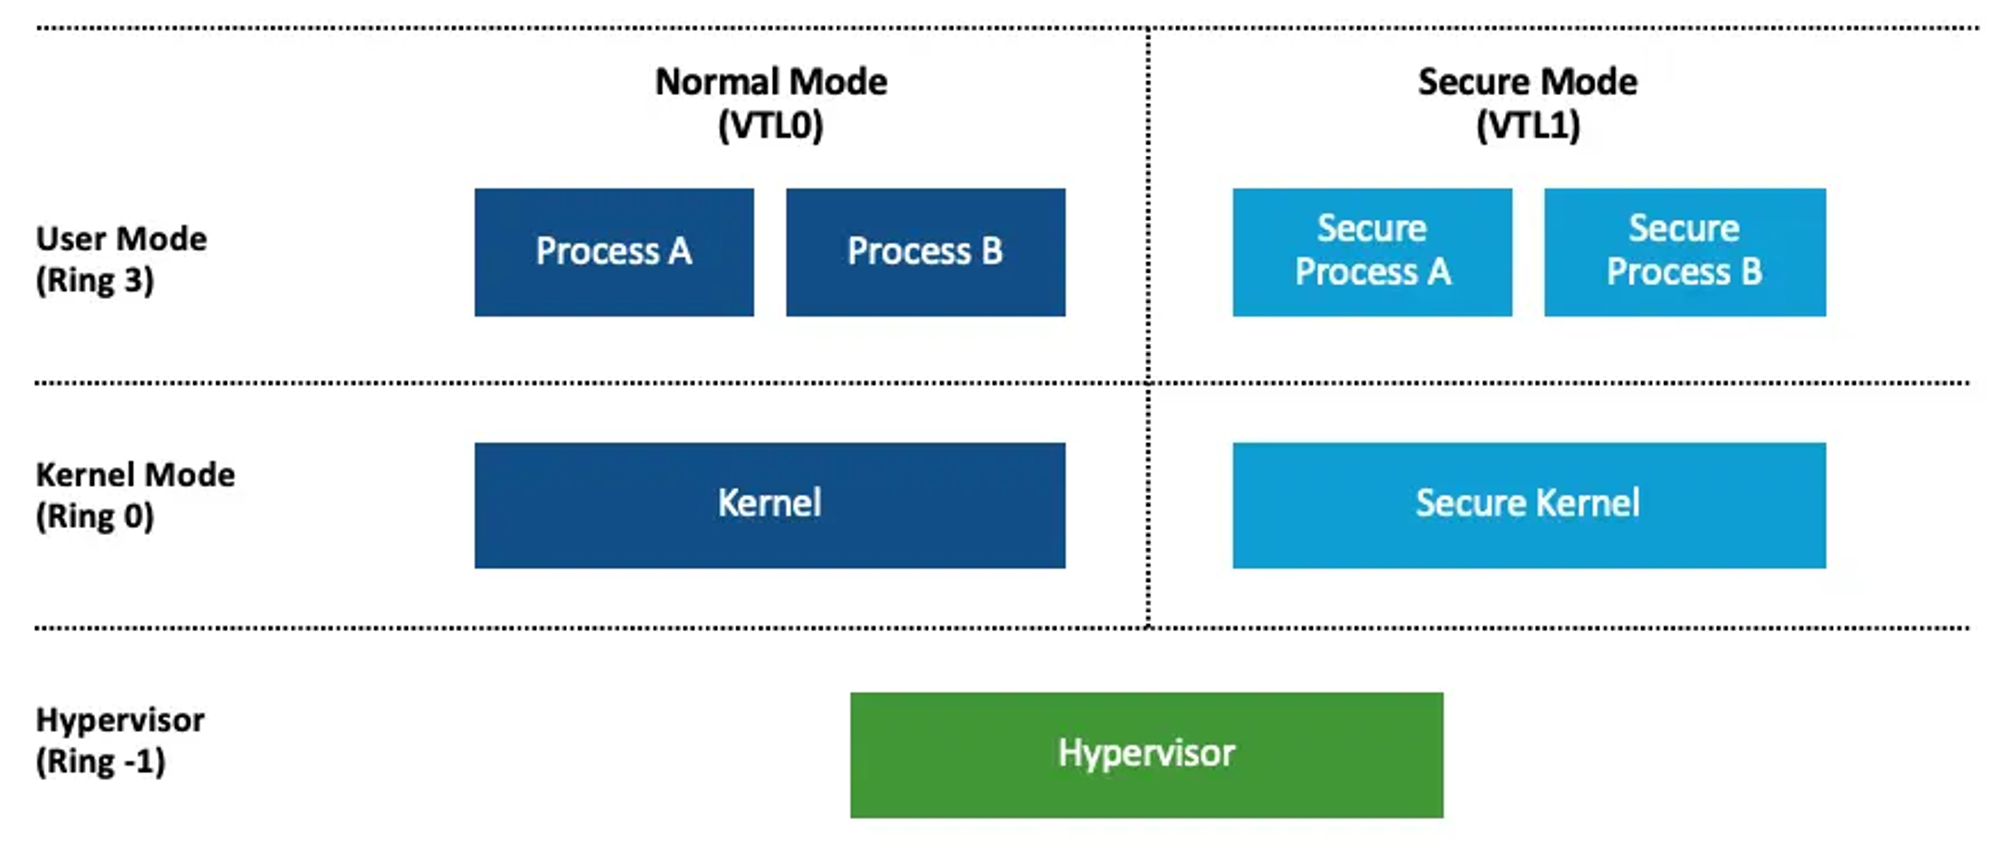
VBS divides the system into different Virtual Trust Levels (VTLs). Higher VTL levels have greater privileges, and lower-level VTLs cannot access higher-level VTLs. Currently, Windows implements two VTL levels.
UEFI Lock
To prevent VBS from being easily disabled, VBS implements a feature called UEFI Lock. To turn off VBS, the user must boot into a Microsoft-signed EFI application that prompts the user during boot. Because of Secure Boot, only signed code can run during boot, meaning VBS cannot be disabled without physical access to the machine.
Bypassing UEFI Lock
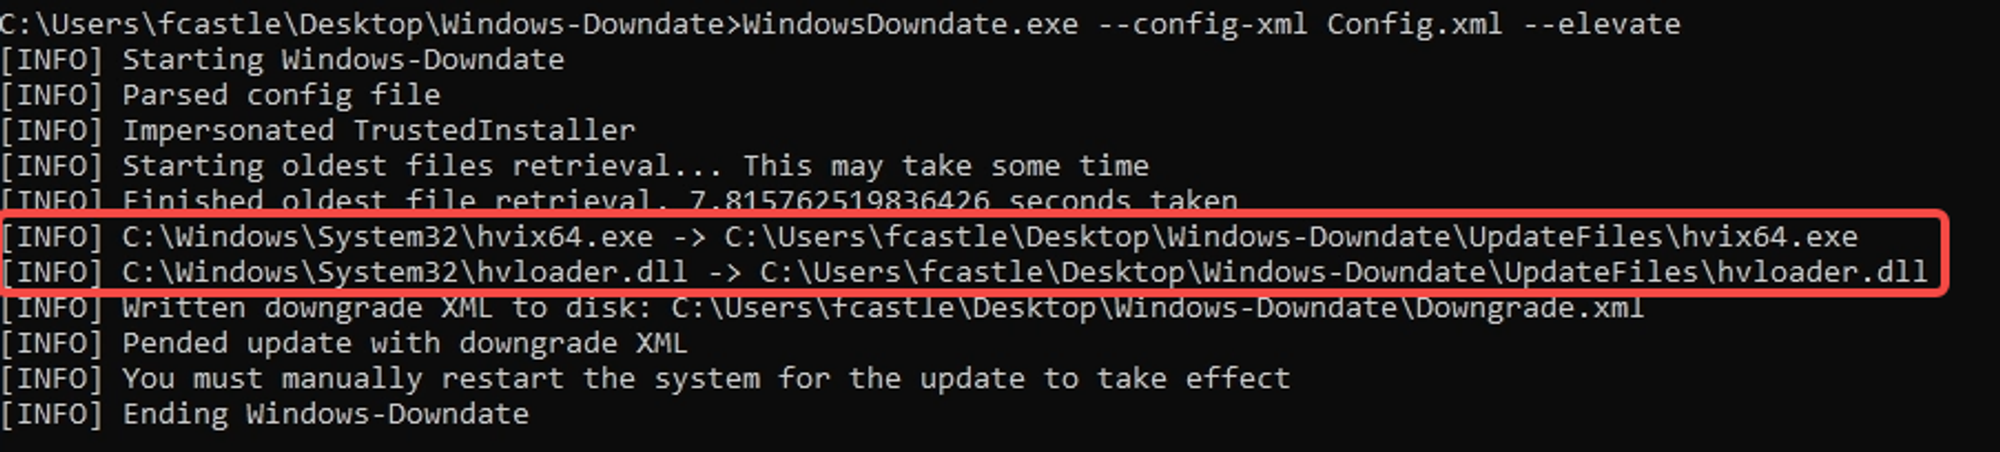
The author discovered that if we use the aforementioned attack method to replace the Secure Kernel or the hypervisor powering VBS, the computer still boots normally but silently disables VBS.
The author replaced:
MsMpEng.exe(Antimalware Service Executable)securekernel.exe(NT Secure Kernel)ntoskrnl.exe(NT Kernel & System)ntfs.sys(NT File System Driver)fltMgr.sys(Microsoft File System Filter Manager)ci.dll(Code Integrity Module)
By replacing these files, we can bypass Protected Process Light (PPL), Credential Guard, and Windows Defender, and bypass UEFI Lock to perform credential dumping.
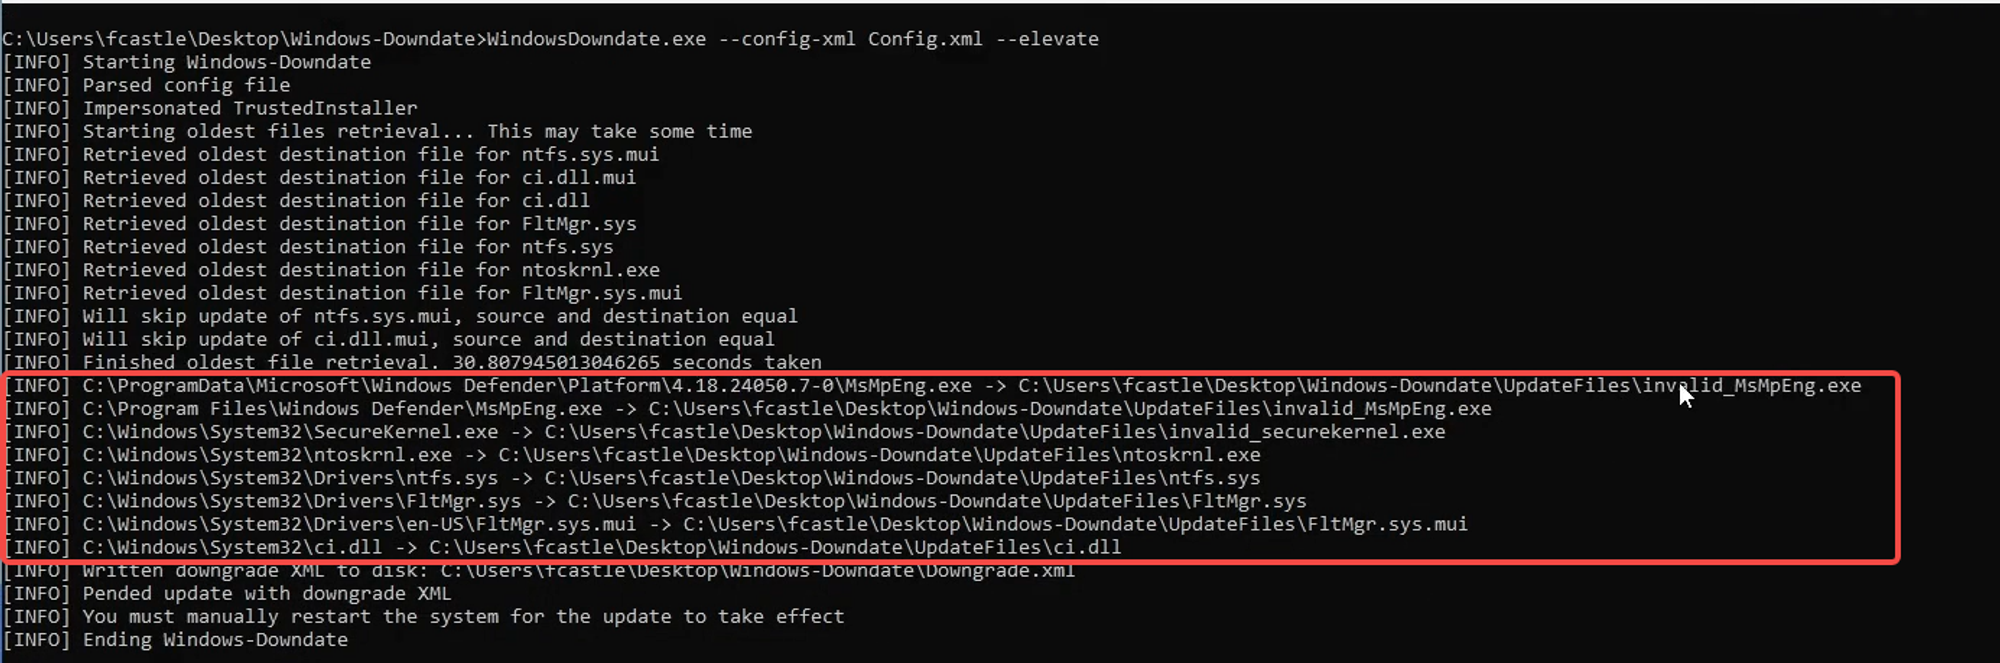

Bypassing VBS Security Boundaries
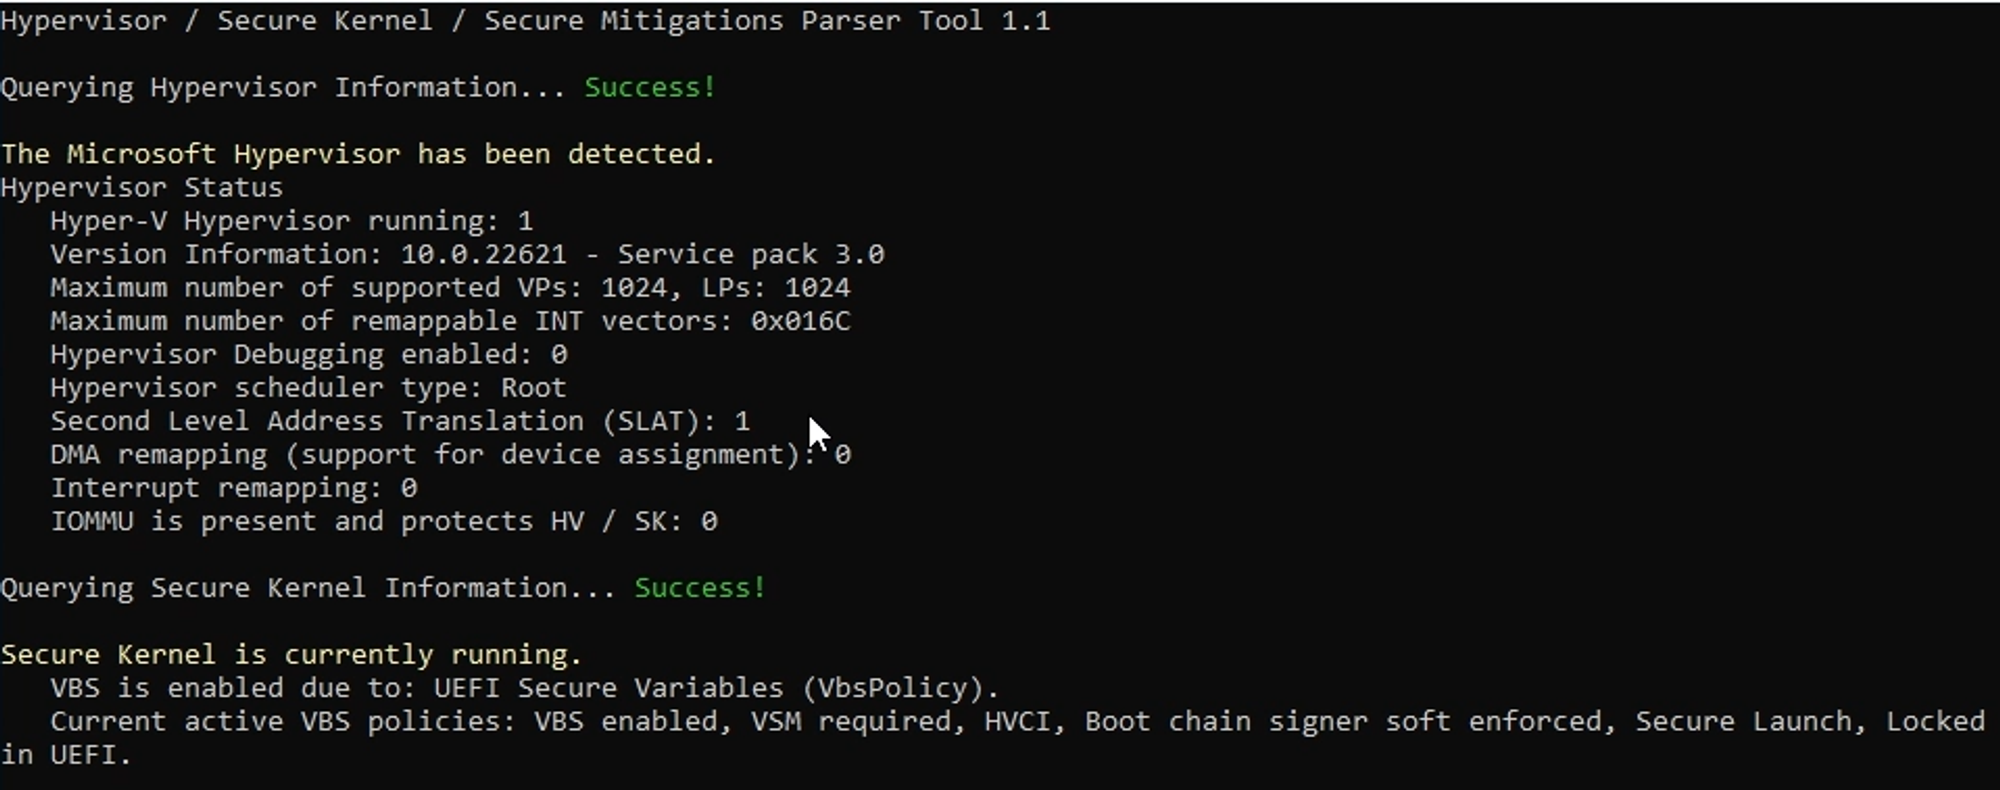
As described in the VBS architecture, VBS separates the system into different VTLs. By downgrading related system files, we can exploit historical vulnerabilities to bypass VTL boundaries.
Before Downgrade:
Downgrade:
After Downgrade: